Cat6e Wiring Guide: A Comprehensive Overview (Updated 01/24/2026)

This guide details Cat6e cabling, covering standards like T568A/B, essential tools, and materials—including 100% bare copper options—for optimal
Gigabit and 10 Gigabit Ethernet performance․
Cat6e cabling represents a significant advancement in network infrastructure, building upon the foundations laid by earlier standards like Cat5e and Cat6․ Designed to support the increasing bandwidth demands of modern networks, Cat6e (Enhanced Category 6) offers improved performance characteristics, particularly in reducing crosstalk and interference․ This makes it an ideal choice for environments requiring reliable Gigabit Ethernet and even 10 Gigabit Ethernet capabilities over shorter distances․
Understanding Cat6e is crucial for anyone involved in network installation, maintenance, or troubleshooting․ It’s important to note that Cat6e cables are often constructed with 100% bare copper wire, unlike some alternatives utilizing copper-clad aluminum (CCA), ensuring full compliance with industry standards․ Proper installation, adhering to wiring standards like T568A and T568B, is paramount to realizing the full potential of Cat6e cabling․
Understanding Cat6e Performance Specifications
Cat6e cabling distinguishes itself through key performance specifications vital for modern network demands․ Primarily, Cat6e supports frequencies up to 500 MHz – double that of the original Cat6 standard’s 250 MHz․ This increased bandwidth capacity directly translates to improved data transmission speeds and reduced latency․ Crucially, Cat6e is designed to reliably handle Gigabit Ethernet (1000Mbps) over the full 100-meter distance, a standard requirement for most networks․
Furthermore, Cat6e can support 10 Gigabit Ethernet (10Gbps) speeds, though typically over shorter distances than Gigabit Ethernet․ The IEEE 802․3bz standard, adopted in 2016, further enhances Cat6e’s capabilities․ Understanding these specifications is essential when selecting cabling for specific network applications and ensuring optimal performance and future-proofing․
Cat6e vs․ Cat6: Key Differences
While both Cat6 and Cat6e support Gigabit Ethernet over 100 meters, the primary distinction lies in their bandwidth capabilities․ Cat6 cables are rated for frequencies up to 250 MHz, whereas Cat6e doubles this to 500 MHz․ This enhanced bandwidth allows Cat6e to potentially support 10 Gigabit Ethernet, although typically over shorter distances compared to Gigabit speeds․
Cat6e achieves this improved performance through stricter specifications regarding crosstalk and system noise․ Essentially, Cat6e incorporates tighter twists in the wire pairs and often utilizes higher-quality materials, like 100% bare copper, to minimize interference․ While Cat6 remains a viable option for many applications, Cat6e offers a more future-proof solution, particularly for networks anticipating increased bandwidth demands․
Wiring Standards: T568A and T568B
When terminating Cat6e cables, adhering to a wiring standard is crucial for reliable network performance․ The two most prevalent standards are T568A and T568B․ Both define the specific order in which the eight wires within the cable are arranged at the RJ45 connector․ T568B is generally more widely adopted in North America, making it a common default choice for many installers․
However, consistency is paramount․ Regardless of which standard you select—T568A or T568B—it must be maintained throughout the entire network․ Mixing standards can lead to connectivity issues and significantly degraded performance․ Couplers are designed to be compatible with both wiring schemes, ensuring interoperability when used correctly․
Detailed Comparison of T568A and T568B
The primary difference between T568A and T568B lies in the arrangement of the orange and green wire pairs․ T568A maintains the original color order as they appear in the cable, while T568B swaps the positions of the orange and green pairs․ Specifically, in T568A, green pair wires are positioned before the orange pair, and vice versa in T568B․
This seemingly minor alteration doesn’t inherently impact performance if consistency is maintained․ However, T568B’s wider adoption often simplifies compatibility with pre-terminated cables and equipment․ Choosing between them often comes down to existing infrastructure or organizational preference, but always ensure uniformity across all connections within your network for optimal results․
Choosing the Right Standard for Your Network
Selecting between T568A and T568B largely depends on your existing network infrastructure and specific needs․ If you’re building a new network from scratch, T568B is generally recommended due to its greater prevalence and wider compatibility with readily available patch cables and networking devices․ However, if integrating with an existing network utilizing T568A, maintaining consistency is crucial․
Inconsistent wiring can lead to performance issues and connectivity problems․ Regardless of the chosen standard, meticulous documentation of your wiring scheme is vital for future troubleshooting and maintenance․ Prioritize uniformity throughout your entire network to ensure reliable data transmission and avoid potential conflicts․
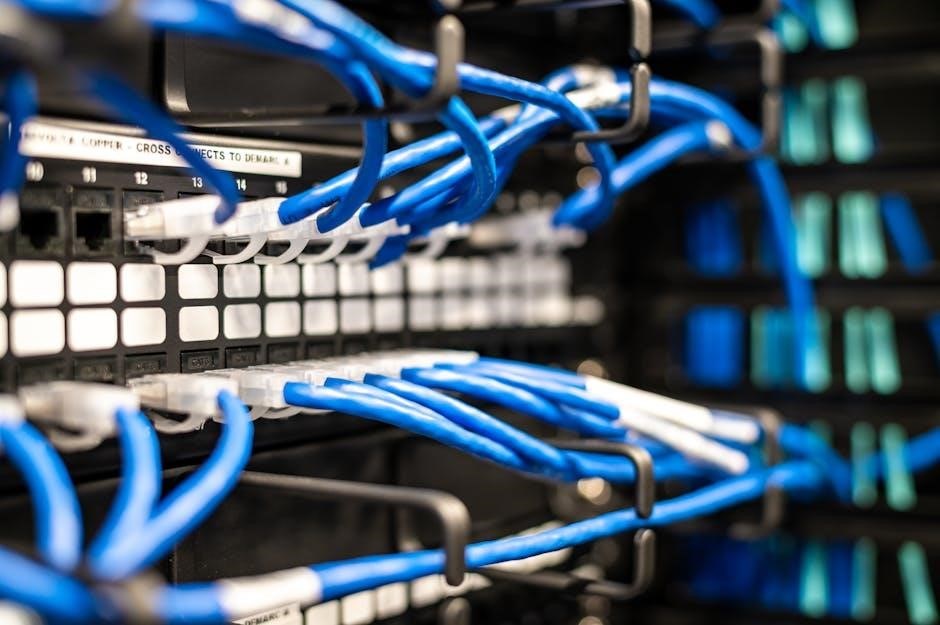
Essential Tools for Cat6e Wiring
Successful Cat6e installation hinges on having the right tools․ A high-quality crimping tool is paramount, ensuring secure and reliable RJ45 connector attachment․ Look for a tool designed specifically for Cat6e, capable of handling the thicker gauge wire․ Equally important is a robust cable tester; this verifies continuity, identifies wiring faults like crossed wires or opens, and confirms proper termination․
Additional helpful tools include a cable stripper for precise jacket removal, a wire cutter, and potentially a punch-down tool if working with patch panels․ Investing in quality tools minimizes errors, saves time, and ultimately guarantees a stable and high-performing network connection․
Crimping Tools and Their Importance
A crimping tool is arguably the most critical component in Cat6e wiring․ It securely attaches the RJ45 connector to the cable, establishing the electrical connection․ Using a tool specifically designed for Cat6e is vital, as these cables have a larger diameter than older standards․ Inferior tools can lead to improperly seated contacts, resulting in intermittent connectivity or complete signal loss․

Look for a crimping tool with a built-in cutter and stripper for added convenience․ Proper crimping ensures all eight wires make consistent contact, maximizing performance and reliability․ A well-maintained crimping tool is a small investment that prevents significant network troubleshooting headaches down the line․
Cable Testers: Ensuring Connectivity
Cable testers are indispensable for verifying the integrity of Cat6e installations․ These devices confirm that all eight wires are correctly connected, free from shorts, opens, or crossed pairs․ A basic cable tester checks for continuity, while more advanced models can measure cable length and identify signal degradation․
Testing before connecting devices saves considerable troubleshooting time․ Utilizing a cable tester proactively identifies wiring errors, preventing network downtime and ensuring optimal performance․ Look for testers that support multiple standards, including Cat6e, and provide clear pass/fail results․ Regular testing, even after initial installation, helps maintain a reliable network infrastructure․
Cat6e Cable Construction and Materials
Cat6e cables differ in construction, notably between solid and stranded varieties․ Solid core cables are best for permanent installations, offering superior performance, while stranded cables provide flexibility for patch cords․ Crucially, genuine Cat6e cables utilize 100% bare copper wire, unlike cheaper alternatives employing copper-clad aluminum (CCA)․
Furthermore, Cat6e cables are available in shielded (STP/S/FTP) and unshielded (UTP) options․ Shielded cables offer enhanced protection against electromagnetic interference (EMI), vital in noisy environments․ S/FTP cables feature foil around each twisted pair and an overall braid, providing maximum shielding․ Choosing the right cable depends on the specific application and potential interference sources․
Solid vs․ Stranded Cat6e Cable

Solid Cat6e cable features a single, continuous copper conductor within each wire, making it ideal for permanent installations like in-wall runs․ Its rigidity provides excellent performance and minimizes signal loss over longer distances․ However, it’s less flexible and prone to breakage with repeated bending․
Conversely, stranded Cat6e cable consists of multiple thinner wires bundled together, offering significantly greater flexibility․ This makes it perfect for patch cables that are frequently moved or connected/disconnected․ While convenient, stranded cable generally exhibits slightly higher signal attenuation compared to solid core, especially at higher frequencies․ The choice depends on the application’s needs – permanence versus portability․
The Importance of 100% Bare Copper Wire
Using 100% bare copper wire in Cat6e cabling is crucial for achieving optimal performance and reliability․ Unlike copper-clad aluminum (CCA) wire, which uses a cheaper aluminum core with a thin copper coating, bare copper offers superior conductivity․ This translates to lower signal loss, reduced impedance, and improved overall network speed and stability․
Hyperline Cat6e cables specifically utilize 100% bare copper, ensuring full compliance with industry standards and delivering consistent Gigabit and 10 Gigabit Ethernet speeds․ CCA cables may appear cost-effective initially, but their inferior conductivity can lead to connectivity issues and reduced lifespan, ultimately negating any savings․ Investing in genuine bare copper cabling is a smart long-term decision․
Shielded (STP/S/FTP) vs․ Unshielded (UTP) Cat6e Cable
Cat6e cables come in both shielded and unshielded varieties, each suited for different environments․ UTP (Unshielded Twisted Pair) is the most common type, suitable for typical home and office networks where electromagnetic interference (EMI) isn’t a significant concern․ However, in environments with high EMI – near industrial equipment, power lines, or radio transmitters – shielded cables are recommended․
STP (Shielded Twisted Pair) features a foil shield around each twisted pair, while S/FTP (Screened Foiled Twisted Pair) offers an overall screen and foil shielding around each pair, providing superior protection․ These shielded options minimize crosstalk and interference, ensuring reliable data transmission․ LAPP cables, for example, are available as S/FTP, offering robust shielding for demanding applications․ Choosing the right cable depends on the specific installation environment and potential interference levels․
Step-by-Step Cat6e Wiring Process
Cat6e wiring requires precision for optimal performance․ Begin with careful cable preparation, gently removing the outer jacket without nicking the internal wires․ Next, arrange and twist the wires according to your chosen standard – T568A or T568B – maintaining consistent twist rates․ This minimizes crosstalk․
Once arranged, trim the wires to a uniform length (approximately ½ inch) and carefully crimp RJ45 connectors using a dedicated crimping tool․ Ensure each wire fully seats within the connector․ A proper crimp is vital for a secure and reliable connection․ Finally, always test the cable to verify continuity and identify any potential wiring errors before deployment․
Cable Preparation and Jacket Removal
Proper cable preparation is foundational for successful Cat6e wiring․ Begin by carefully stripping the outer jacket, typically using a cable stripper designed for this purpose․ The goal is to remove the jacket without damaging the delicate internal wires․ Avoid nicking or cutting the insulation of the twisted pairs, as this can significantly degrade performance․
A clean, precise cut is crucial․ Once the jacket is removed, expose approximately 1-2 inches of the twisted pairs․ Gently untwist the pairs, preparing them for arrangement according to the chosen wiring standard (T568A or T568B)․ Remember, minimizing damage during this stage ensures optimal signal transmission and a reliable network connection․
Wire Arrangement and Twisting
Following jacket removal, precise wire arrangement is vital․ Organize the eight wires according to either the T568A or T568B wiring scheme – consistency is key! Maintain the correct color order as defined by your chosen standard․ Once arranged, gently twist the wires together, forming a consistent and uniform twist․
This twisting is not merely aesthetic; it’s crucial for reducing crosstalk and electromagnetic interference (EMI)․ The twists help cancel out noise, ensuring a cleaner signal․ Maintain the twist as close to the connector as possible, typically within ½ inch․ A well-formed twist contributes significantly to the overall performance and reliability of the Cat6e connection․

Crimping RJ45 Connectors
With wires correctly arranged and twisted, carefully insert them into the RJ45 connector, ensuring each wire reaches the end and maintains its designated position within the connector․ The jacket of the cable should extend slightly into the connector for strain relief․
Utilize a crimping tool to firmly press the connector onto the cable, securing the wires․ A proper crimp ensures all eight wires make solid contact with the connector’s pins․ Inspect the crimped connector; all the pins should be fully inserted and visible․ A poorly crimped connector can lead to intermittent connections or complete failure, so quality is paramount for reliable Cat6e performance․
Testing and Troubleshooting Cat6e Connections
After crimping, cable testing is crucial to verify a successful connection․ Employ a cable tester to confirm continuity and identify any wiring faults, such as open circuits, short circuits, or crossed wires․ A reliable tester will map each wire, indicating any discrepancies in the wiring scheme—whether T568A or T568B․
Common issues include improperly seated wires within the RJ45 connector or a faulty crimp․ If failures are detected, re-crimp the connector, ensuring proper wire seating and a firm connection․ Always test both ends of the cable․ Consistent testing guarantees optimal performance for Gigabit and 10 Gigabit Ethernet networks, preventing frustrating connectivity problems․
Using a Cable Tester to Verify Continuity
A cable tester is indispensable for validating Cat6e connections․ It sends signals through each wire, confirming that each conductor maintains a continuous path from one RJ45 connector to the other․ The tester displays results, indicating whether each wire is correctly connected, open, shorted, or crossed․
Begin by selecting the appropriate testing mode – typically, a continuity test or a wire map test․ Connect one end of the Cat6e cable to the main unit and the other end to the remote unit․ A successful test will show all wires passing, confirming proper T568A or T568B wiring․ Any failures necessitate investigation and potential re-termination․
Identifying and Resolving Common Wiring Issues

Common Cat6e wiring problems include open circuits (broken wire), short circuits (wires touching), and crossed wires (incorrect pairing)․ A cable tester pinpoints these issues, displaying which wires fail․ Open circuits require re-termination, ensuring proper contact within the RJ45 connector․ Shorts often stem from damaged cable jackets or improperly stripped wires – repair involves careful re-stripping and re-termination․
Crossed wires indicate incorrect adherence to T568A or T568B standards․ Double-check the wire arrangement against the chosen standard and re-crimp the connector․ Always inspect for bent pins or damaged connectors, replacing them if necessary․ Consistent testing after each fix is crucial for a reliable connection․
Cat6e and Gigabit/10 Gigabit Ethernet
Cat6e cabling is specifically engineered to support high-speed network applications․ It reliably handles Gigabit Ethernet, achieving speeds of 1000Mbps over the standard 100-meter distance․ However, Cat6e’s enhanced performance—boasting a bandwidth of 500MHz—allows it to facilitate 10 Gigabit Ethernet (10Gbps) speeds, though typically over shorter distances than Gigabit․
This capability is due to tighter specifications and improved construction compared to standard Cat6․ The IEEE 802․3bz standard, adopted in 2016, further optimized Ethernet over single twisted-pair cabling, leveraging Cat6e’s potential for increased bandwidth and efficiency in modern networks․
Supporting 1000Mbps (Gigabit) over 100 Meters
Cat6e cabling guarantees robust support for 1000Mbps (Gigabit) Ethernet connections across the full 100-meter distance specified by networking standards․ This reliability stems from the cable’s construction, utilizing quality materials like 100% bare copper wire to minimize signal loss and interference․ Proper installation, adhering to T568A or T568B wiring schemes, is crucial for maintaining this performance level․
Furthermore, utilizing correctly crimped RJ45 connectors and employing a cable tester to verify continuity ensures a stable Gigabit connection․ Shielded (STP/S/FTP) or unshielded (UTP) options are available, with shielded cables offering enhanced protection in environments with high electromagnetic interference․
Enabling 10Gbps Speeds with Cat6e (500MHz)
Cat6e distinguishes itself by doubling the transmission frequency to 500MHz, unlocking the potential for 10Gbps speeds, though typically limited to around 55 meters depending on cable quality and environmental factors․ Achieving these higher speeds necessitates meticulous attention to detail during installation․ Utilizing high-quality components, including connectors and cabling with 100% bare copper conductors, is paramount․
Proper termination and adherence to wiring standards – T568A or T568B – are critical․ Shielded cabling (STP/S/FTP) can further enhance performance in noisy environments․ Thorough testing with a cable tester is essential to verify the integrity of the connection and confirm 10Gbps capability․
IEEE 802․3bz Standard and Cat6e
The IEEE 802․3bz standard, ratified in 2016, significantly impacts Cat6e cabling by defining specifications for 1000BASE-T operation over longer distances and enabling 2․5GBASE-T and 5GBASE-T technologies․ This standard allows for Gigabit Ethernet over 100 meters using existing Cat6e infrastructure, reducing the need for costly cable upgrades․
It broadened the scope of applications for Cat6e, making it a viable solution for emerging network demands․ The standard focuses on optimizing power efficiency and reducing latency, crucial for modern network applications․ Compliance with 802․3bz ensures interoperability and reliable performance within these newer Ethernet standards, maximizing the investment in Cat6e cabling․
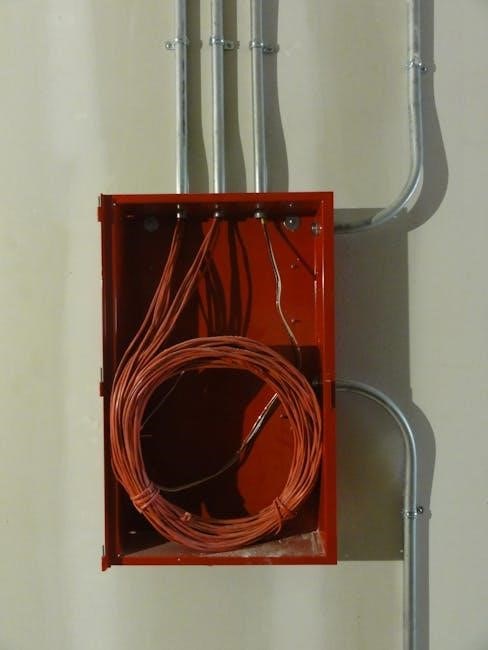
Cat6e Couplers and Compatibility
Cat6e couplers facilitate extending network connections without significant signal loss, crucial for installations exceeding standard cable lengths․ These couplers must maintain the Cat6e performance specifications, supporting frequencies up to 500MHz․ Compatibility is paramount; couplers should seamlessly work with both 6 and 8-position RJ45 connectors utilizing T568A and T568B wiring schemes․
Selecting high-quality couplers ensures minimal impedance mismatch and maintains data integrity․ Proper installation is vital – avoid sharp bends and ensure secure connections․ When choosing couplers, verify they are specifically designed for Cat6e to guarantee optimal performance and avoid bottlenecks in your network infrastructure․ They are essential for flexible network design․
Color Coding and Cable Identification
Consistent color coding is fundamental for accurate Cat6e wiring, preventing errors and simplifying troubleshooting․ Both T568A and T568B standards utilize specific color sequences for the eight wires within the cable․ While both work, maintaining a uniform standard throughout your network is crucial․ Beyond the standard colors, employing cable identification methods—like labeling—is highly recommended, especially in complex installations․
Using color-coded labels or cable ties allows for easy tracing and identification of individual connections․ For non-standard cable colors, clear labeling becomes even more important․ Proper identification streamlines maintenance, upgrades, and fault finding, saving valuable time and resources․ A well-labeled network is a manageable network․